How do you use the new Sound Recorder in Phasmophobia? With the latest update, ‘Chronicle,’ the media system has been completely overhauled in Phasmophobia, introducing more events, new sounds, and a new way to earn money by paparazzi-ing the undead. Players will now be able to earn money by recording paranormal sounds during their investigation, the frantic panic of friends being chased, or the disconcerting giggle of a ghost who finds something funny about your career choice.
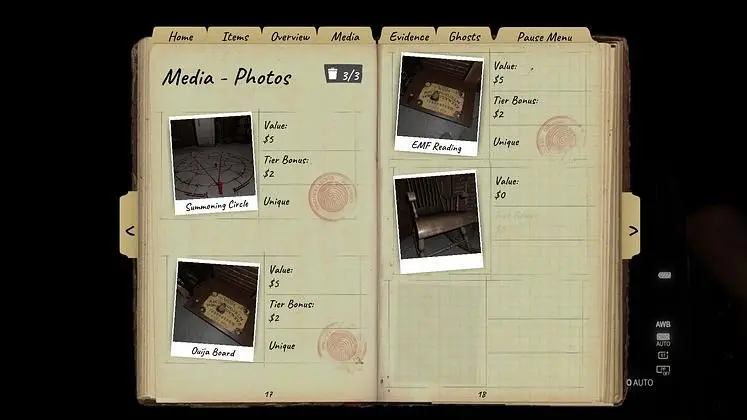
This update disrupts the media system and how you generate revenue from it in Phasmophobia. Now your media tab is split into Photos, Videos, and Audio. You can capture events like salt piles being disrupted with a video camera. However, now you won’t receive as much compensation for duplicates, so you should refrain from spamming with salt photos.
The new Sound Recorder isn’t used for evidence, but it is a great way to earn a bit of extra cash while ghost hunting in Phasmophobia.
How do you use the new Sound Recorder in Phasmophobia?
The most significant change in the Chronicle update is how we earn money and experience — it’s all about media now. Instead of being limited to just taking photos of ghost events, you can now record them using two new tools: the Sound Recorder and a new recording function on the Video Camera.
That said. You’re now limited to 13 total media slots, shared across the three media types:
- 5 Photos
- 5 Videos
- 3 Audio Recordings
There’s also a fundamental change to how media payouts work. Now, every piece of media is classified as either unique or a duplicate. You can only capture one version of each event for full value — any duplicates will be worth significantly less.
So, if you’re aiming for a perfect game, you’ll need to mix things up and diversify your recordings. Let’s go over those quickly:
Photos
The Chronicle update has changed how you can get a perfect game. Previously, it was as simple as filling out pictures of salt or engaging in easy interactions. Now, however, you’re limited to 5 photos, and instead of stars, there is a system that rates photos based on their uniqueness.
There are some significant changes, and a few that might prove to be a pain. For example, you can now take pictures of EMF readings if you’re unable to find exactly what the ghost interacted with. Also, the three ghost forms — physical, D.O.T.S., and shadow — now all count as separate photos, so in theory, you could capture pictures of all three!
However, some evidence and interactions have been moved over to video media, so we can no longer photograph them for easy cash. These include the following:
- Ghost Disrupting salt
- Ouija Board responses
- Light Switch Interactions
- Door Being Moved
- Objects Thrown
Videos
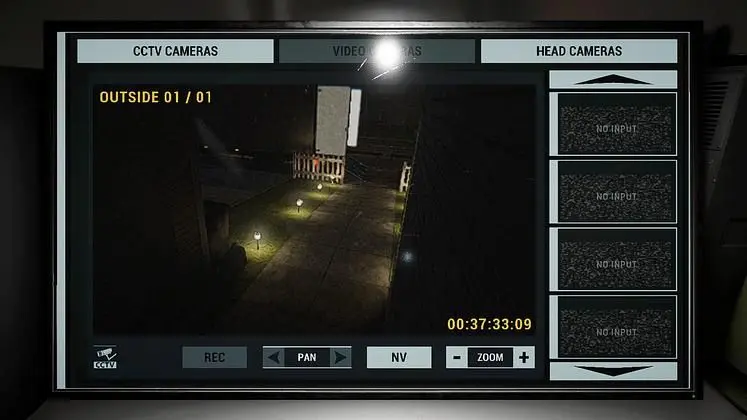
You can now fill up your journal with up to 5 videos.
To record, you will need to have any tier of video camera, hold the use button (right mouse default), and be within range of the event, so that the video can be replayed in the Media/Videos section.
Some things to record are:
- Ghost Events
- Interactions (ghosts throwing stuff, opening doors)
Tip: You can even record stuff from the safety of your van with the new equipment in there. All you need is to have a camera set up!
Sound Recorder
Last but not least: The Sound Recorder. With this new piece of equipment, ghost hunters will be able to capture paranormal sounds such as spirit box responses or sounds during ghost events.
It’s somewhere between a Parabolic Mic and an EMF in terms of functionality, as you will need to use the device to track down the source of a sound and get close enough to record anything useful.
As there are three journal slots just for audio, if you want that perfect game, you’ll need to try out this piece of gear!
All three tiers function the same; they will detect a sound within their range, and you’ll need to trace down the source as well as make sure the device is recording.
How to Unlock the Sound Recorder
To try out the new equipment, start by purchasing a Tier I Sound Recorder from the ‘Shop’ tab of the GH//OS.T store unlocked at level 4. It is described as ‘old, banged up and taped together,’ which is pretty accurate. While this tier is technically functional, it is somewhat unreliable and ineffective in capturing ghost sounds.
We recommend skipping the first tier if you have the required level and funds.
Tier I Sound Recorder
Once acquired, you might notice the Tier I Sound Recorder’s interface doesn’t come with clear instructions. A red light turns on when it’s activated and blinks while recording. The array on the right acts as a visual indicator to help you track and get within range of recordable sounds. The range is just 3 meters, so start recording early to catch anything.
- The red light on the top left shows the Sound Recorder is turned on. As it picks up sounds, the array on the right acts like a little game of hot and cold, lighting up more as you get closer to the source.
- To start recording and move within range of a recordable sound. Then, press and hold the usekey (right mouse button/R2/RT by default) to begin recording.
- The power light will blink red while recording. Audio files can be found in the media/sounds tab.
Tier II Sound Recorder
The next tier of the Sound Recorder is much more intuitive than the previous model. Tier II is equipped with a display screen that shows a decibel threshold; you can only record sounds that exceed this reading. We recommend starting with this device over Tier I whenever possible.
- This Sound Recorder features a display that makes it much easier to track activity and know when it’s turned on.
- While the screen shows incoming sounds, it doesn’t indicate their direction.
- As before, press and hold the use key (right mouse button, R2, or RT by default) to start recording before the sound goes over the threshold line.
Tier III Sound Recorder
Last but not least is the Tier 3 Sound Recorder, unlocked at Level 60 — and it’s worth the wait. It outperforms the earlier models with a boosted 5-metre listening radius and some handy display doo-dads that show both direction and distance, even for the faintest sounds.
- You’ll want to aim for this upgrades as fast as you can.
- This model is similar to the Tier 3 EMF, featuring both directional and distance indicators on its display, which help the user quickly pinpoint the source of the sound.
Use the compass directional dash to find sounds within its 7m range.
If we spot anything else, we will come back and update this guide. Future patches may modify some elements of this page, and we will revisit if that happens.
For the latest gaming news, follow GameWatcher on BlueSky, check out our videos on YouTube, or give us a like on Facebook. We sometimes include affiliate links in our posts, which grants us a small commission, thank you. Please support independent Games Media. ❤️


